How to Laminate Bookmarks Without Bubbles or Curling
The mistake that ruins most laminated bookmarks is cutting the film flush to the card, which leaves an open edge for the film to peel from. To laminate bookmarks so they last, seal them in 3 mil film with a gap around every strip, let them cool flat, and trim with at least 1/8 inch of clear border. Each thing that goes wrong after that, bubbles, cloudy patches, curl, peeling, smeared ink and a torn hole, has a fix below.
The base method with a pouch laminator
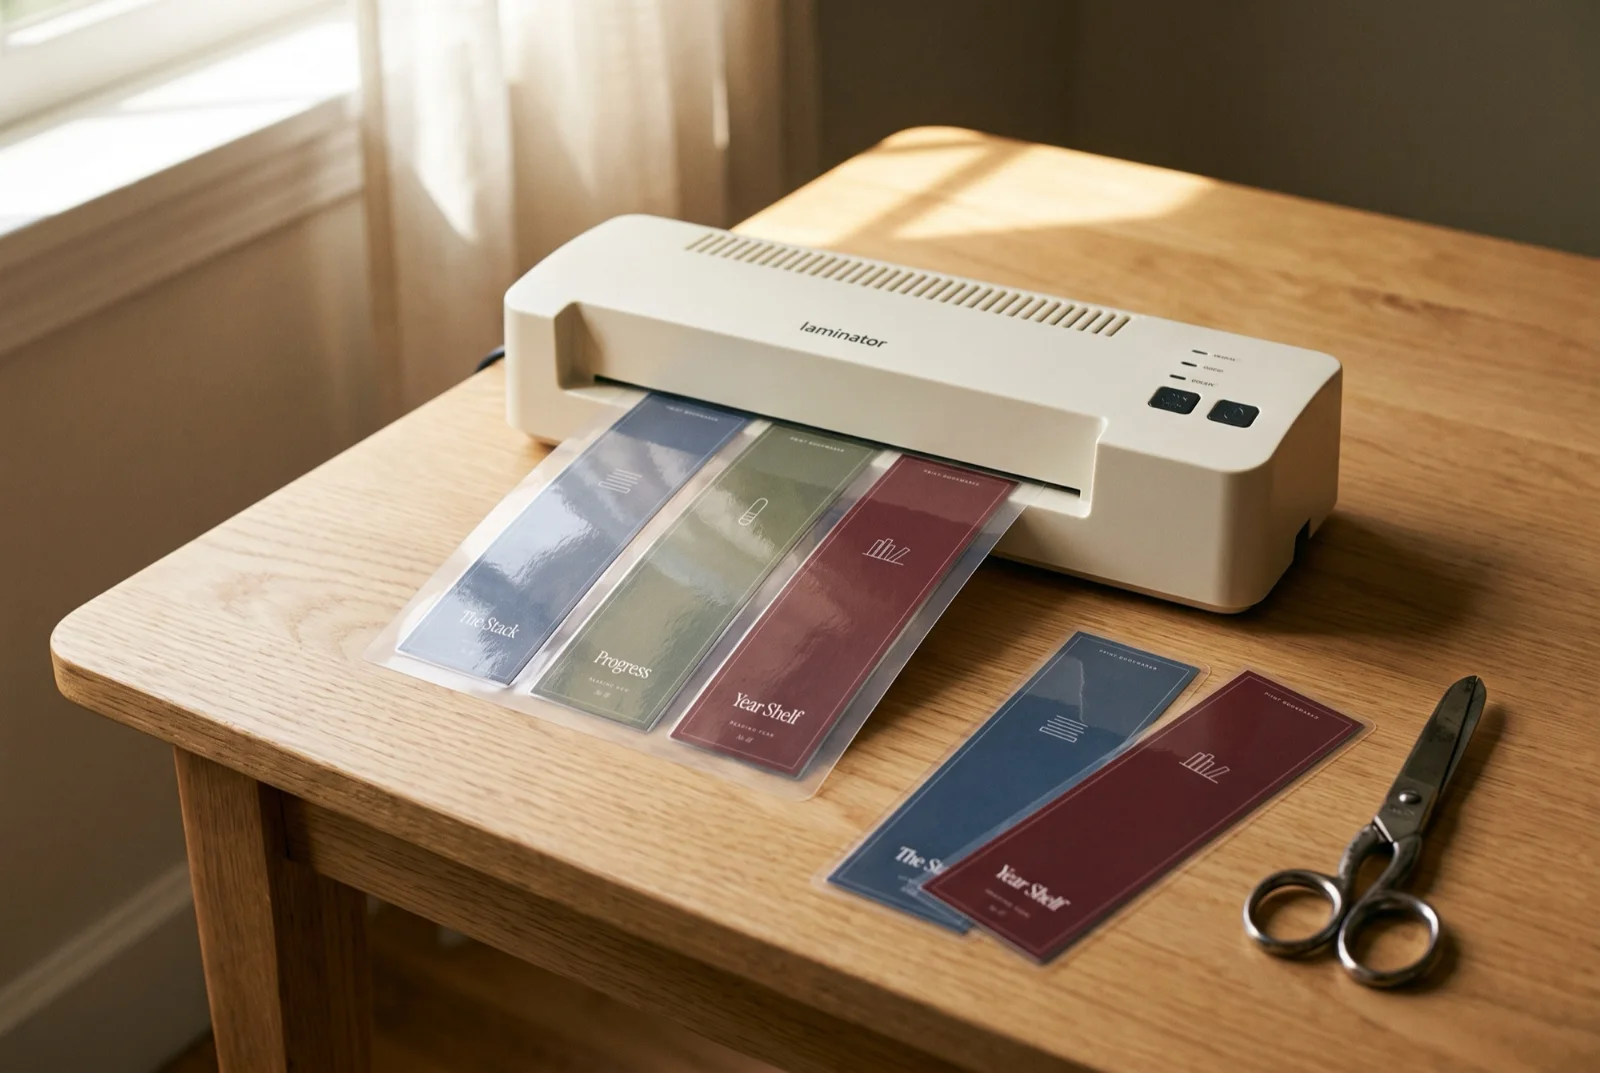
Use a 3 mil letter pouch, lay three cut bookmarks inside with gaps between them, and run it through a fully warmed machine. Film is sold by the mil, a thousandth of an inch, and the figure is per layer. MyBinding puts it plainly: "A 3 mil pouch has a film layer 0.003 inches thick on each side of the document." Thicker is rarely better between pages. Fellowes recommends 3 mil when documents should "stay protected while also being fairly flexible" and warns that "sometimes a thick pouch compromises flexibility."
A letter pouch such as the GBC 3 mil letter pouch is 9 by 11.5 inches. It holds three 2 by 7 inch strips with about 3/4 inch of film between and beside them, and every strip stays clear of the sealed edge. Feed the pouch sealed edge first, so the strips cannot slide toward the opening, and let it run out onto the table by itself. Then cut down the middle of each gap. The machine is an adult's job, and a 7-year-old can lay out the strips.
How to laminate bookmarks without a laminator
Self-seal sheets come closest to a machine finish. A thermal pouch will not work cold, and that GBC pouch lists cold lamination as "No." GBC describes its self-sealing sheets as "self-adhesive" sheets that "do not require heat to create a lasting seal." They are single-sided, so each face needs its own sheet, which is two letter sheets for three strips.
Peel the backing from the first sheet and lay it sticky side up. Place the strips with the same 3/4 inch gaps, then lower the second sheet from one end while you smooth it down with a ruler. A child of 8 can do the smoothing with an adult holding the far end.
Wide clear packing tape covers one bookmark today. Lay a length sticky side up, press the strip on, cover the other face and trim. Where two runs of tape overlap the seam shows, so tape is fine for a school bag and wrong for a gift. Many print shops and office supply stores laminate pages too, the easy answer for a class set of 30 when nobody owns a machine.
Before you laminate: a checklist
Most laminating problems start before the pouch goes in. Run through this list once per batch.
- The card is cut to its final size, on the cut marks, with straight edges.
- Everything that belongs on the bookmark is on it. Pencil will not mark the film afterward, so a child's name and the date go on the back now.
- Marker ink and inkjet prints are dry to the touch.
- Any tracker on the back is full, or this strip stays unlaminated for now.
- A hole for a tassel is already punched, 3/8 inch wide and about 1/2 inch below the top.
- The pouch is 3 mil, or 5 mil at most, and the machine has warmed up fully on the matching setting.
- The strips sit with about 3/4 inch between them, and nothing touches the sealed edge.
- A scrap strip of the same card goes through first, so the first real bookmark is not the test.
The usual thing a parent wants to seal is a bookmark a child colored. The free coloring bookmarks are drawn for a 2 by 7 inch strip with thick lines, four to a sheet, in 18 themes. A 6-year-old colors on Saturday and the film goes on Sunday. Hold back the version with the reading log on the back, though, because a sealed log cannot be filled in.
Bubbles under the film
A bubble is air that found no way out. Under a self-seal sheet, bubbles come from laying the top sheet down flat all at once, which traps air in the middle. Lower it from one end and push the ruler ahead of the contact line, so the air leaves before the film lands. A bubble under a bonded sheet will not come out, so go slower on the next strip.
In a thermal pouch, a bubble or a silvery patch usually means the film did not reach full heat. A second pass, once the machine is back to temperature, clears it. A pouch that enters at an angle can also trap air along one side, so start it straight and let the rollers take it.
Cloudy or silvery film
Cloudy film is a heat problem. MyBinding's troubleshooting guide says a document "will become silvery or cloudy if you don't have enough heat." On a home machine that happens in two ways. The first is starting before the ready light, which on a small laminator can take several minutes. The second is a long run: after a class set of 30 strips, 10 pouches in a row, a laminator may need time to regain heat.
Pause after every few pouches and let the machine come back to temperature. Check that the setting matches your pouch thickness, then run the cloudy pouch through again. One that stays cloudy after two passes becomes the test strip for the next batch.
A bookmark that curls
Curl comes from cooling in a bend, from film much thicker than the card, or from paper too thin to hold the film flat. Let the pouch run out of the machine onto a flat table and leave it there for a minute. Pulling it out by the leading edge sets a curve while the film is still warm. For a batch, slide each finished pouch under a heavy book while the next one runs.
The card matters as much as the film. Put 5 mil film on plain printer paper and you get a stiff strip that keeps whatever curve it cooled in. The fix is the card underneath. The printable bookmarks are made for 65 lb cover cardstock, about 176 gsm, which gives 3 mil film something to hold onto.
Edges that peel
Peeling starts where film meets film with no margin, or where the strip touched the sealed edge of the pouch. MyBinding's trimming guide advises leaving "at least 1/8" border around your encapsulated paper." Cutting closer, it warns, "could potentially compromise the lamination and allow moisture and dirt to get in." Cut down the middle of each 3/4 inch gap, which leaves about 3/8 inch of clear film beside every strip. Then trim the ends to a border of 1/8 to 1/4 inch.
The shortcut with a class set is to squeeze four strips into a pouch. Four 2 inch strips in a 9 inch pouch leave 1 inch for five gaps, about 3/16 inch each, too little to cut a border from. Three per pouch, and a class of 24 is 6 printed sheets and 8 pouches.
Round the corners with scissors, since a square corner catches on pages and lifts first. For a class set for Teacher Appreciation Week, the teacher appreciation bookmarks carry a From line, and every child signs it before the film goes on.
Ink that smears
Smears happen when wet ink meets film. Marker is the usual cause on a child's bookmark, and the coloring bookmarks page says to let marker ink dry before you laminate. The same goes for an inkjet print, which is wet when it leaves the printer. Give both a few minutes flat, and keep the colored side from rubbing against another strip while you load the pouch. Crayon and colored pencil are dry the moment they go on.
If you are unsure how a print will take heat, a photo strip for instance, self-seal sheets avoid the question.
A hole that tears
A hole punched through film and card together leaves bare card at the rim, where moisture gets in and the tassel pulls. Two ways round it. Punch the card before laminating, a 3/8 inch hole centered about 1/2 inch below the top. Laminate as usual, then punch a 1/8 inch hole through the film at the center of the first one. That leaves about 1/8 inch of sealed film all round the big hole. Or punch after laminating and fit a small eyelet to cover the bare edge.
Both need a sharp punch and one bookmark at a time on a firm surface. The dotted circle at the top of the printed bookmarks marks the spot. Punching is for an adult or an older child, threading for anyone. To add a tassel, make it from embroidery floss or yarn and knot its loop through the small hole.
Writing on a laminated bookmark
Pencil will not mark the film, so anything written after sealing is marker. GBC sells its letter pouches as "dry-erase friendly, so you can write, wipe and reuse." A fine dry-erase marker suits a bookmark that tracks only the current book, a page number that changes every night and wipes off with a thumb. For a name that should stay, use a fine permanent marker and give it a minute to dry.
A reading log you fill in over months belongs on paper. Slip it into a clear sleeve while it is in use. Laminate it once the last row is written, in June for a school year or in December for a reading year.
Sources
- MyBinding, How to Choose the Right Laminating Pouch Thickness (2026) (last checked 2026-10-02)
- Fellowes, Selecting the Best Laminating Pouches for Your Project (n.d.) (last checked 2026-10-02)
- GBC, Thermal Laminating Pouches, Letter Size, 3 mil, 25 Pack (n.d.) (last checked 2026-10-02)
- GBC, Self Sealing Laminating Sheets, Single-Sided, Letter Size, 3 mil (n.d.) (last checked 2026-10-02)
- MyBinding, Lamination and Laminators Troubleshooting Guide (n.d.) (last checked 2026-10-02)
- GBC, Thermal Laminating Pouches, Letter Size, 3 mil, 200 Pack (n.d.) (last checked 2026-10-02)
- MyBinding, What Are My Options for Trimming My Laminated Documents? (2026) (last checked 2026-10-02)