How to Write in Cursive, One Letter Family at a Time
To learn how to write in cursive, start with the four lowercase undercurve letters i, t, u and w, and leave the alphabet order for later. Those four share one stroke, and that stroke opens 13 of the 26 lowercase letters. From there you add the overcurve and downcurve families, then the joins, the capitals and finally a name.
Start with four letters instead of the alphabet
Start with i, t, u and w, written small, on lined paper. Each one is the same undercurve stroke, a swing from the baseline up to the right, followed by a retrace down. Learn that swing once and 4 letters arrive together. The alphabet order begins with a, an oval that has to close, and then jumps between families for 26 letters.
The order matters because cursive is one skill stacked on another. The New Jersey Department of Education's guidance to schools names the sequence as letter formation, then connections, then spacing, then fluency. It asks for explicit teaching with ample guided practice before students write on their own, and for formation to be accurate and automatic before anyone composes in cursive. At home that means a letter family a day, joined words once the letters are steady, and a name last.
What schools expect, if your child's school teaches it
If your child is in grade 3 or above, there is a fair chance cursive is on the timetable. New Jersey law requires public schools to teach it in grades 3 to 5 from the 2026-2027 school year. The state's memo sets the goal as a child who can read and legibly write cursive by the end of grade 5.
Pennsylvania passed a law requiring cursive in public and private schools, according to The 74. The national count is uncertain even within that article, which says 18 other states, while a legislator quoted in it says at least 24.
The benefit claims in those debates come from lawmakers, and The 74 cites no research for them. The study most often behind the headlines, reported by Science News, found increased brain connectivity in college students who wrote words by hand instead of typing. It mentions cursive only in passing and did not test whether the students remembered the words. A third grader's reason to learn cursive is simpler. The class will use it, and a grandparent's card is written in it.
Paper, pencil and a cursive alphabet chart
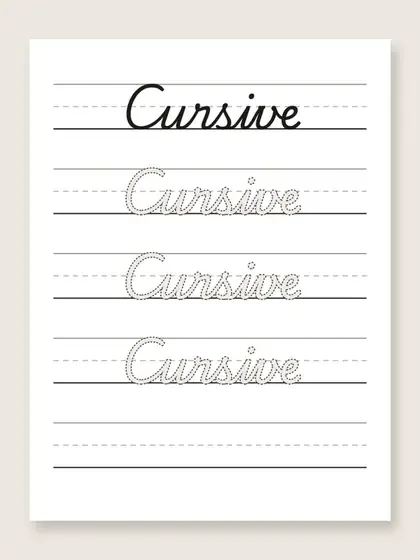
Use paper with 3 guide lines, a baseline, a dashed midline and a top line. Small letters live between the baseline and the midline, tall letters reach the top line, and the lines give every stroke a name. Reading Universe recommends modeling strokes with named guide lines, and it notes that many lowercase letters are made without lifting the pencil, which is what cursive asks of every letter.
A sharp pencil beats a pen in the first weeks, because loops get erased and redrawn often. Keep a cursive alphabet chart on the desk, from a workbook or drawn by hand, and copy from it rather than from memory. A learner of 7 or 8 will otherwise reinvent the r and the s every day. Turn the top of the page a little to the left for a right hand, a little to the right for a left hand, and keep that angle so the slant stays even.
The undercurve family
The undercurve family is the biggest, 13 letters, and it splits into three groups that are worth a day each. They differ in how high the swing goes and what happens at the top.
- Day 1 is i, t, u and w. Swing up, retrace down, swing out. The t is taller than the i, the u is two i's without dots, and the w is a u with a small flat bridge at the end.
- Day 2 is e, l, h, k, b and f. The swing goes to the top line and loops back over itself on the way down. The e is a tiny loop that stays below the midline.
- Day 3 is r, s, j and p. The swing stops at the midline and does something small. The r gets a shoulder, the s a closed hook, the j and the p a drop below the baseline.
Write each letter 5 times in a row, then write the row again and compare. Look for an i that reaches the top line, a t crossed at the midline, and loops on l, h and b so narrow they fill in with graphite. Dot the i and cross the t after the row, never in the middle of a letter.
The overcurve family
The overcurve is the opposite swing, up from the baseline and over the top to the right, like a hump. Six letters use it, m, n, v, x, y and z. The m has 3 humps and the n has 2. The first hump of each is the entry stroke itself, which is where most learners add one hump too many.
- m and n have humps of one width, feet on the baseline, and finish with an undercurve out.
- v and x have one hump, then a slant down, then an undercurve up to the midline. The v ends with a bridge, the x gets its cross after the word.
- y and z have one hump, then a drop below the baseline that loops back up.
Write "mn" as a run of 5 humps and count them aloud for the first few rows. A 7-year-old counts well before their hand does.
The downcurve family
The downcurve begins at the midline and curves down and to the left, the way a c starts. Six letters are built on it, a, c, d, g, o and q. All 6 are ovals, and all fail the same way, with a gap at the top where the oval did not close, so an a reads as a u and a d reads as cl.
- a and o make the oval and close it at the midline. The a then retraces down and swings out, the o finishes with a bridge at the midline.
- c is the oval left open on purpose, the one letter in the family that never closes.
- d makes the oval, then a stem up to the top line and back down, with no loop.
- g and q make the oval, then drop below the baseline and loop. The g loops to the left, the q to the right.
Practice this family at twice the usual size for the first 2 days, so the oval has room to close, then shrink it back.
How to write a whole word in cursive
A word in cursive is the letters you already have plus the joins between them, and there are only 2 kinds of join. Most letters finish on the baseline with an undercurve, and that exit stroke becomes the next letter's entry. Four letters finish high. The b, o, v and w end at the midline with a short bridge, so the next letter starts there and drops its own upswing.
Practice the baseline join first with pairs like "it", "in" and "ul", then the bridge join with "on", "wa" and "br". Once the pairs are smooth, write words and lift the pencil only after the last letter to add dots and crosses.
Spacing is the step the New Jersey memo lists after connections. Letters in a word touch through their joins, and words sit about one lowercase letter apart. If a word comes out cramped, the fix is almost always the exit strokes, which need to travel as far sideways as they travel up.
Worked example: the word "home", letter by letter
"home" uses all three families and both joins in 4 letters, which makes it a good first word.
- h. Undercurve from the baseline to the top line, loop, straight down to the baseline, then one hump up to the midline and down again. Finish with an undercurve that rises toward the midline. Do not lift.
- o. The pencil is now near the midline. Curve down and around to the left, close the oval at the midline, and finish with a small bridge to the right.
- m. The m starts from the bridge, so it loses its usual upswing. From the midline, go over into the first hump, then two more, feet on the baseline, and exit with an undercurve.
- e. From that exit, a small loop below the midline, down to the baseline, and a tail out to the right. Now lift.
Check that every letter sits on the baseline, the h is the only tall letter, the o is closed and the m has three humps. Write "home" 3 times, then try "hope", which swaps the m for a p and keeps the bridge join.
Capitals come last
Leave the capitals until the lowercase joins are automatic, because a capital appears once per sentence or name and lowercase letters appear everywhere else. There are 26 to learn, and many share strokes with their lowercase cousins. The capital C, O and A grow out of the downcurve oval, the capital M and N out of the overcurve hump.
The one rule that matters is whether a capital joins to the letter after it. A capital whose last stroke lands on the baseline heading right, like A, C or M, joins straight into the next letter. One whose last stroke ends in the air or back on the left, like T, F or D, does not. Lift the pencil and give the next letter its own entry stroke.
Which capitals fall into which group depends on the chart your school uses, so follow the chart on your desk. Learn them in the order they will be used, the writer's initial first, then the rest in groups of 5.
Write a name
A name is the first whole piece of cursive most people want, and it makes a good final level. It has one capital, one set of joins and a reason to practice. Write it with the chart in view, then from memory, then 3 times fast, and compare the fast version with the first.
A child still working on print letters is better served by the name writing practice routine, since joined letters add nothing until the print ones are steady. For a cursive model to trace, the cursive generator writes a name or a sentence of up to 80 characters in joined school cursive. It prints a tracing worksheet with one solid row, up to three dotted rows and blank rows, or 4 name bookmarks of 2 by 7 inches with the name, a dotted copy and an empty row each.
The name bookmark maker is the wrong tool here. It draws names in thick outlined bubble letters for coloring, a different craft that suits a younger sibling better than a cursive learner. A lined page with the name written out by a parent works as well as any printed worksheet.
A daily practice plan
Keep the sessions short and daily. Reading Universe's point about letter formation, that it takes early, repeated practice with lots of feedback, applies to cursive just the same. The feedback is what drops out of one long solo session. Each day has 4 rows.
- Row 1 is the day's letters, 5 of each, copied from the chart.
- Row 2 is one join pair from the day's letters, 5 times.
- Row 3 is one word that uses the day's letters, 3 times.
- Row 4 is yesterday's word, written once without the chart, then checked against it.
Week 1 covers the three families in the order above, 3 days for the undercurve letters, 1 for the overcurve, 2 for the downcurve, and a day for "home" and "hope". Week 2 is joins and words from every family. Week 3 is capitals in groups of 5. Week 4 is the writer's name and a sentence of their own. The row 4 check is the last thing to drop, because that is where the eye catches the open a and the extra hump before they settle in.
Questions
Which cursive letters should a beginner learn first?
Start with lowercase i, t, u and w, because they are one undercurve stroke repeated, and a learner can write all four well within the first session. Then add the rest of the undercurve family, the six overcurve letters and the six downcurve letters, and leave the capitals until the lowercase joins feel automatic.
Can an adult teach themselves cursive?
Yes, and the same order works: one family at a time, then joins, capitals and your own signature, with a chart beside you so you copy a model instead of a memory. An adult can use smaller rows from the start, and the cursive generator prints a whole sentence on one page in small rows for exactly that.
How do you make cursive handwriting neater?
Keep every letter on the baseline, keep one slant for the whole word by holding the paper at the same angle, close the oval letters at the top and leave the same gap between words. Then slow down, because most untidy cursive is cursive written faster than the hand can form the letters yet.
Sources
- New Jersey Department of Education, Cursive Handwriting Act (2026) (last checked 2026-10-13)
- New Jersey Department of Education, Cursive Handwriting Instruction (broadcast memo, Feb 11, 2026) (last checked 2026-10-13)
- The 74, Cursive handwriting is set for a comeback in Pennsylvania schools (2026) (last checked 2026-10-13)
- Science News, Handwriting may boost brain connections more than typing does (2024) (last checked 2026-10-13)
- Reading Universe (WETA), How to Teach Letter Formation (n.d.) (last checked 2026-10-13)